All stock codes associated to this product
CLP0597, CL-P0597
Contac 39
CLP0597
Features
Excellent Cost/Performance Value CPU Coolersupports up to 180W.
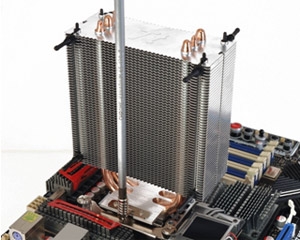
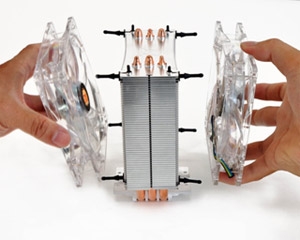
Three 8mm Heat-pipes touching directly the CPU, enhancing heat transfer.
Curved fin design increases airflow and accelerates heat dissipation.
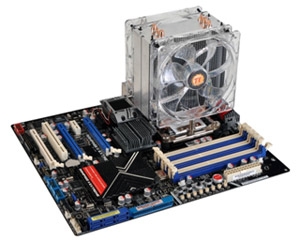
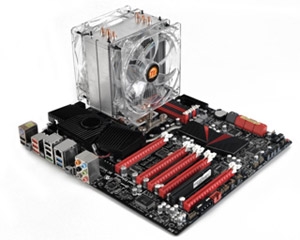
Dual 120mm Blue LED Fans
120mm PWM fan, automatic speed adjustment from 800~2000 RPM.
Anti-vibration soft mounts decrease noise when operating.
Universal Socket Compatibility & Accessory Package
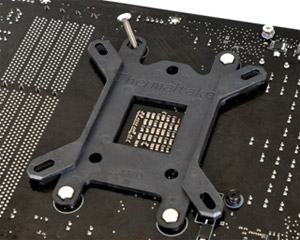
All-in-one back-plate design for accelerated installation
Universal support: Intel socket LGA 2011/1366/1155/1156/775 AMD socket FM1/AM3+/AM3/AM2+/AM2
Dimension
Intel Motherboard Installation
| Step 1 |
Step 2 |
 |
 |
|
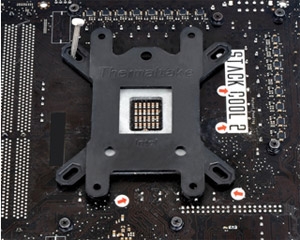
Step One: Insert the four long screws through the back-plate into the four holes on the motherboard and secure them with the four plastic spacers.
|
Step Two: Put the two Intel mounting bars along the four long screws and secure them with four nuts.
|
| Step 3 |
Step 4 |
 |
 |
|
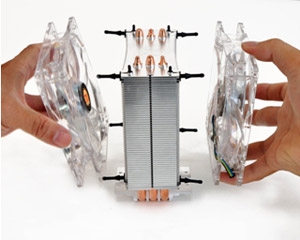
Step Three: Fan module on the cooler must be removed before the installation.
|
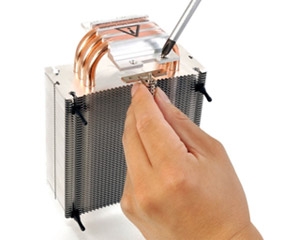
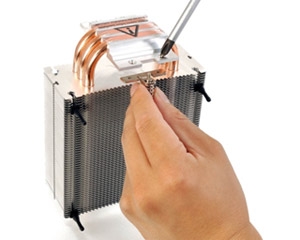
Step Four: Securing the two T-mounting bars to the base of cooler by short screws.
|
| Step 5 |
Step 6 |
 |
 |
|
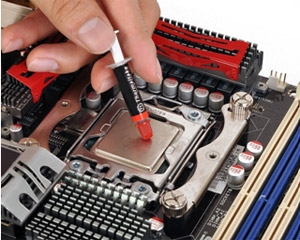
Step Five: Applying a thin layer of thermal grease
|
Step Six: Place the assembled heat-sink onto the CPU and tighten each fixing bolts evenly.
|
| Step 7 |
Step 8 |
 |
 |
|
Step Seven: Reinstall the fan onto the heat-sink
|
Step Eight: Connect the 4-pin wire to the motherboards CPU fan connector. Installation is done. |
AMD Motherboard Installation
| Step 1 |
Step 2 |
 |
 |
|
Step One: Insert the four long screws through the back-plate into the four holes on the motherboard and secure them with the four plastic spacers.
|
Step Two: Put the two AMD mounting bars along the four long screws and secure them with the four nuts.
|
| Step 3 |
Step 4 |
 |
 |
|
Step Three: Fan module on the cooler must be removed before the installation
|
Step Four: Securing the two T-mounting bars to the base of cooler by short screws.
|
| Step 5 |
Step 6 |
 |
 |
|
Step Five: Applying a thin layer of thermal grease
|
Step Six: Place the assembled heat-sink onto the CPU and tighten each fixing bolts evenly.
|
| Step 7 |
Step 8 |
 |
 |
|
Step Seven: Reinstall the fan onto the heat-sink
|
Step Eight: Connect the 4-pin wire to the motherboards CPU fan connector. Installation is done. |
Specifications:
| P/N |
CLP0597 |
| Heatsink Dimension |
120*103.8*159.5mm (L x W x H) |
| Heatsink Material |
Aluminum Fins
Aluminum Base |
| Heatpipe |
8mm x 3 |
| Fan Dimension |
120 x 120 x 25 mm (L x W x H) |
| Rated Voltage |
12 V |
| Start Voltage |
9 V |
| Rated Current |
Low:0.10AHigh:0.25A |
| Power Input |
1.2W (Max 3.0W) |
| Fan Speed |
800 ~ 2000 RPM (PWM) |
| Air Flow |
29.434 ~ 72.084 CFM |
| Air Pressure |
0.356 ~ 1.985(mmH2O) |
| Noise |
15.0 ~ 33.2dBA |
| Life Expectancy |
30,000 Hours |
| Connector |
4 Pin |
| Weight |
645g |
| Compatibility |
Intel
LGA 2011
LGA 1366
Core i7
LGA 1155/1156
Core i7 / Core i5 / Corei3
LGA 775
Core 2 Extreme / Core 2 Quad / Core 2 Duo / Pentium D / Pentium 4/Pentium / Celeron D / Celeron
AMD
FM1
A-series
AM3+ / AM3
Phenom II / Athlon II / Athlon / Sempron series
AM2+ / AM2
Phenom II / Phenom / Athlon / Sempron series |