All stock codes associated to this product
CLP0602, CL-P0602
Overview
- Top-down Blowing Design structure, benefit from cooling both CPU and
motherboard surrounding components.
- 5 x à 6 mm heat-pipes direct touch CPU surface increasing heat
conductivity - Support up to 160W
- Large High density Aluminum fins provides larger surface area to quickly
dissipate heat
- One Powerful 12cm Fan, PWM function with 800~1,800 RPM
- Support all the latest Intel and AMD socket including LGA2011.
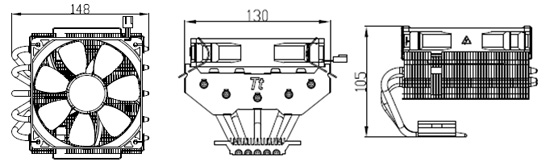
Top-down Blowing Design with 5 Heatpipes
- 5 x à 6 mm heat-pipes direct touch CPU surface increasing heat
conductivity - Support up to 160W
- Top-down Blowing Design benefits from cooling both CPU and motherboard
surrounding components
- Large High density Aluminum fins provides larger surface area to quickly
dissipate heat
Powerful fan
- one Powerful 12cm Fan, PWM function with 800~1,800 RPM
Support Multi-socket Mounting System
Universal socket support :
- Intel: LGA2011,LGA1366, LGA1156, LGA1155, LGA775
- AMD: FM1,AM3+,AM3,AM2+,AM2
CLP0602 BigTyp Revo. Installation
Intel
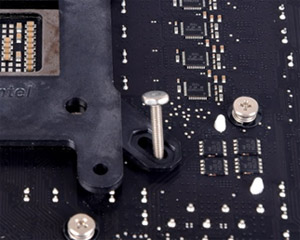
Step One: Insert the four long screws through the back-plate into the four
holes on the motherboard and secure them with the four plastic spacers.
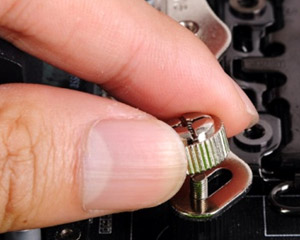
Step Two: Put the two Intel mounting bars along the four long screws and
secure them with the four nuts.
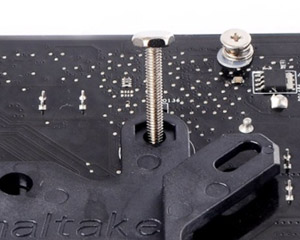
Step Three: For LGA2011: Screwing the LGA 2011 screw onto motherboard tightly
and put the two Intel mounting bars on the LGA 2011 screws. Fasten the four nuts
onto the mounting bars tightly
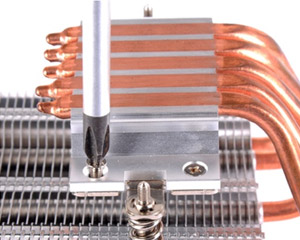
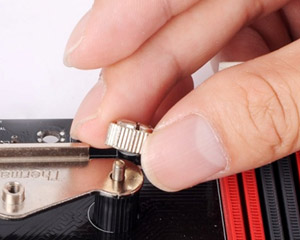
Step Four: Securing the two T-mounting bars to the base of cooler by short
screws
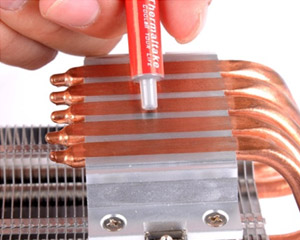
Step Five: Applying a thin layer of thermal grease
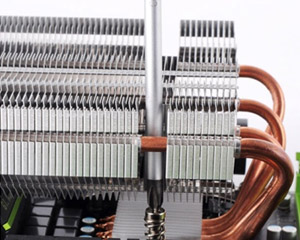
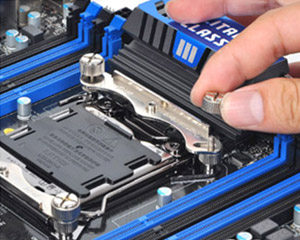
Step Six: Place the assembled heat-sink onto the CPU and tighten each fixing
bolts evenly.
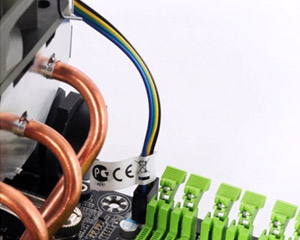
Step Seven: Connect the 4-pin wire to the motherboards CPU fan connector.
Installation is done
AMD
Step One: Insert the four long screws through the back-plate into the four
holes on the motherboard and secure them with the four plastic spacers
Step Two: Put the two AMD mounting bars along the four long screws and secure
them with the four nuts.

Step Three: Securing the two T-mounting bars to the base of cooler by short
screws.

Step Four: Applying a thin layer of thermal grease
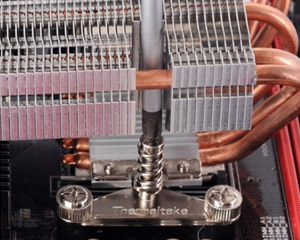
Step Five: Place the assembled heat-sink onto the CPU and tighten each fixing
bolts evenly.
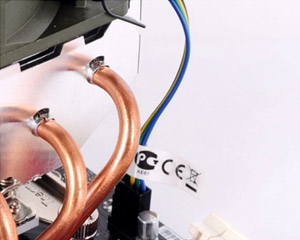
Step Six: Connect the 4-pin wire to the motherboards CPU fan connector.
Installation is done.
Specifications
|
Compatibility |
Intel: |
|
LGA
2011 |
|
LGA
1366 |
|
Core
i7 |
|
LGA
1155/1156/1151/1150 |
|
Core i7/Core
i5/Corei3 |
|
LGA
775 |
|
Core 2 Extreme/Core
2 |
|
Quad/Core 2
Duo/ |
|
Pentium D/Pentium
4/ |
|
Pentium/ Celeron
D/ |
|
Celeron |
|
|
|
AMD: |
|
FM1 /
FM2 |
|
A-series |
|
AM3+ /
AM3 |
|
Phenom II / Athlon II /
Athlon/Sempron series |
|
AM2+ /
AM2 |
|
Phenom II / Phenom /
Athlon / Sempron series |
|
Heatsink
Dimension |
148 x 130 x 105
mm |
|
Heatsink
Material |
Aluminum Fins &
Aluminum Base |
|
Heatpipe |
6mm x
5pcs |
|
Fan
Dimension |
120 x 120 x 25 mm (L x
W x H) |
|
Rated
Voltage |
12V |
|
Started
Voltage |
5V |
|
Rated
Current |
0.40
A |
|
Power
Input |
4.8
W |
|
Fan
Speed |
800-1800
RPM(PWM) |
|
Air
Flow |
85.16
CFM |
|
Air
Pressure |
3.25
mmAq |
|
Noise |
20
dBA |
|
Life time/Fan Life
time |
30,000
Hours |
|
Connector |
4
pin |
|
Cooling
Power |
160W |
|
Weight |
530
g |